Export data (dTag)
In order to be able to train your network in dStudio, you need to create an export of the data you have annotated.
ℹ️ This tutorial will continue with the object detection part using the Glass vials example data set. If you want to proceed with instance segmentation instead, the steps are the same.
Create a new Export
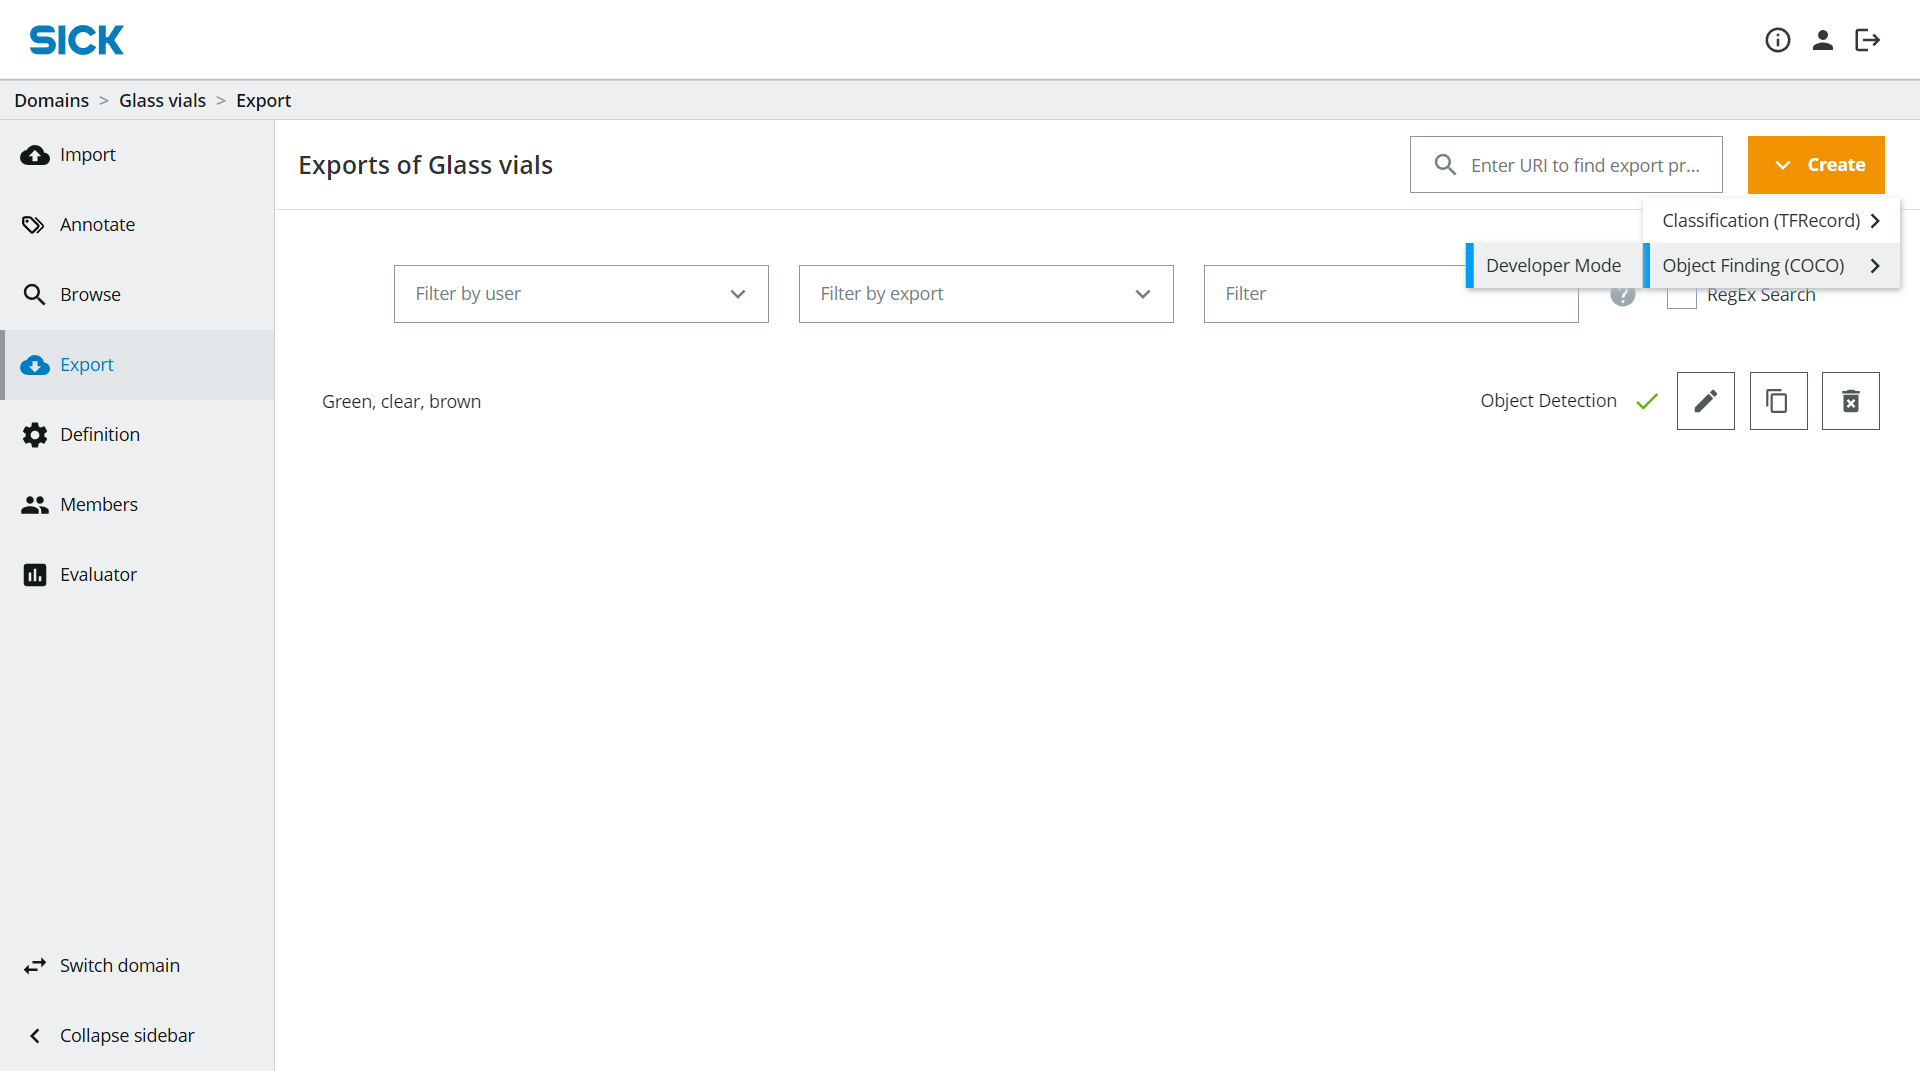
In dTag, go to the Export section where you can also see your already existing Exports. Click on Create → Object Finding (COCO) → Developer Mode.
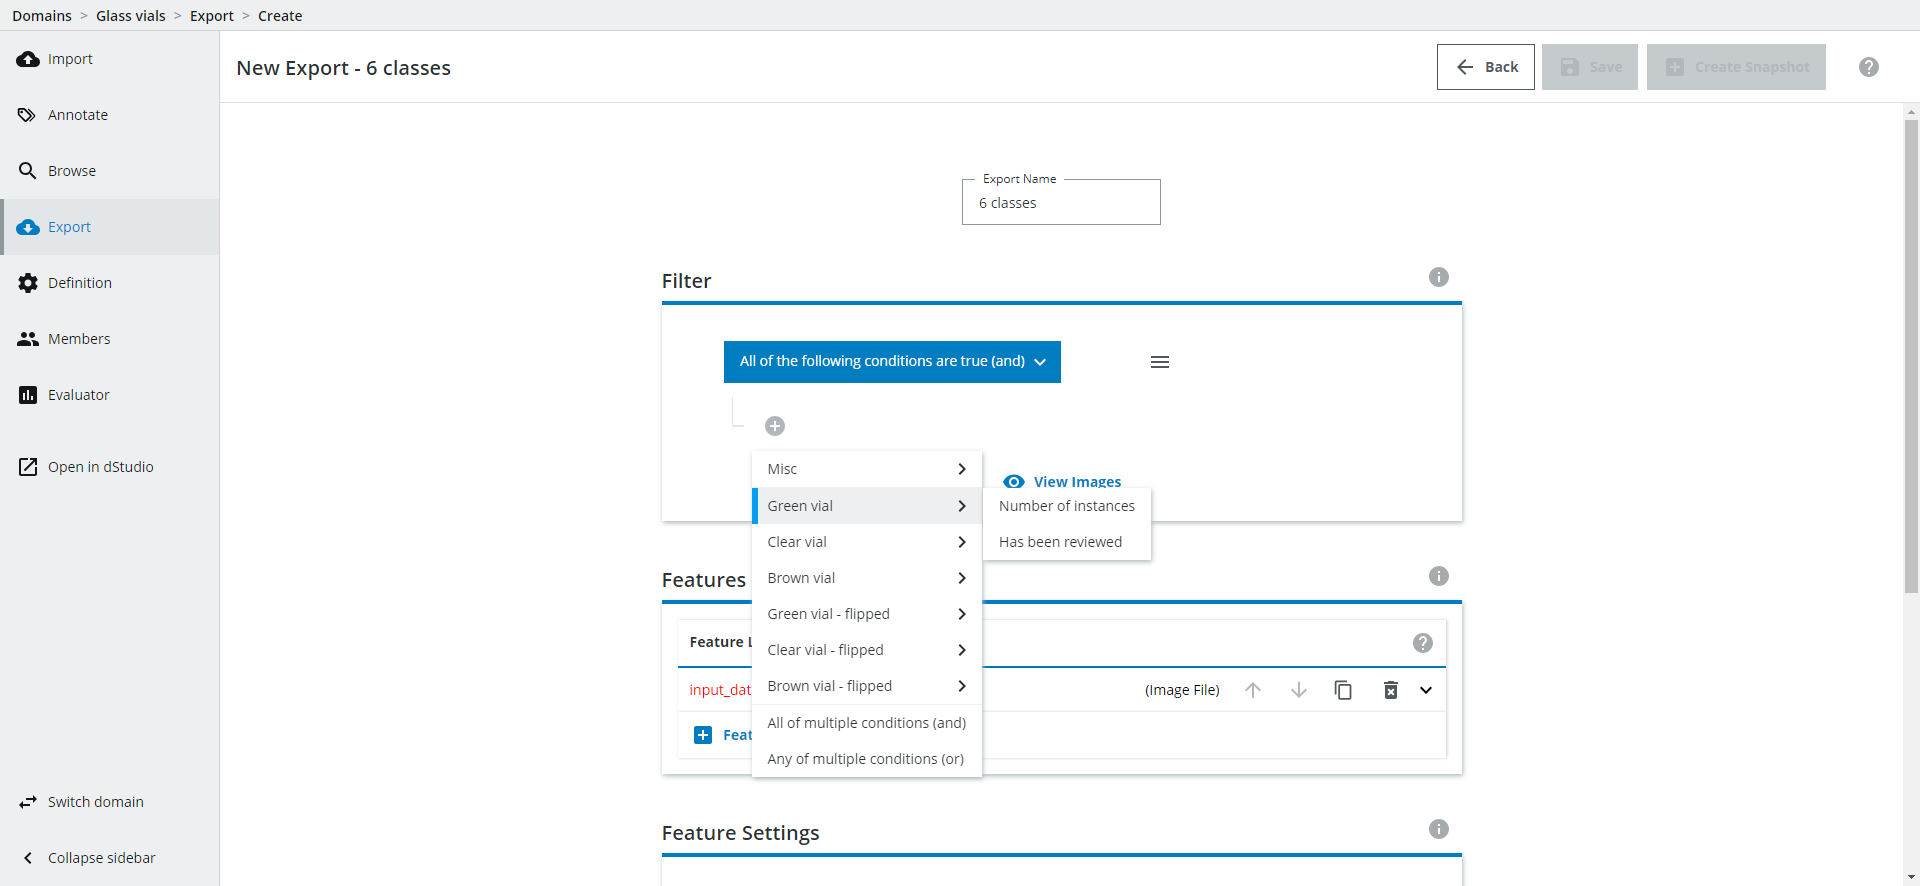
Give your export a suitable Export Name.
Filter: Which images should be included in the Export?
In the Filter option you can filter which images you want to include in your Export, eg. only include images that have been reviewed or has a certain number of instances for a given class, or on some other variable you have set up for the Domain.
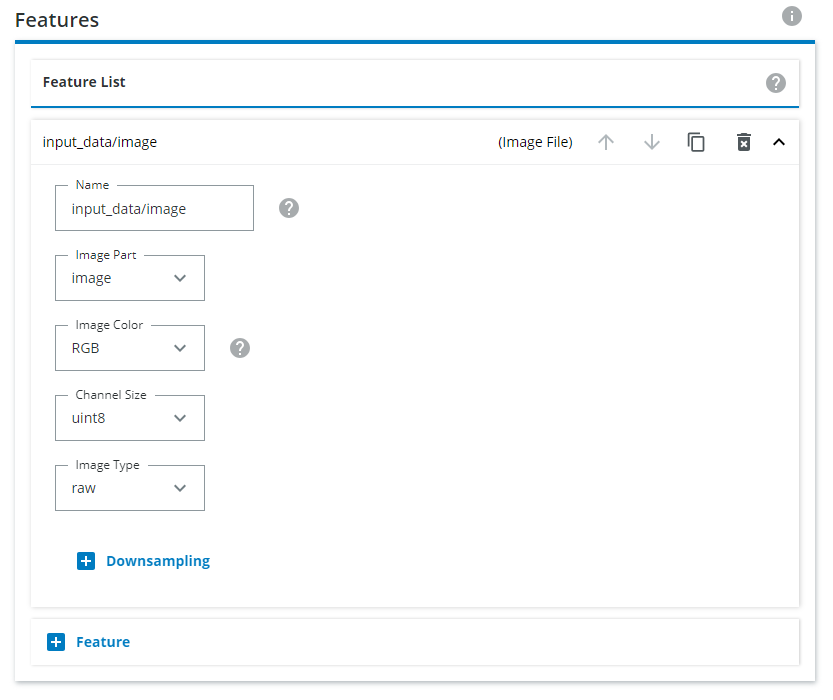
Setting up Features: Defining image types and classes
Under Features, you need to define the input image type. Click on the downward pointing arrow for input_data/image and select Gray for monochrome or RGB for color images. If the images you have saves are .png, choose png in the Encoding setting. If your images are .bmp, choose raw instead.
When creating an export you can either (1) export each class individually or (2) Combine multiple classes into a single class, or do a combination of the two approaches. Both are covered below.
1. Export each class individually
Add a new Feature and choose Instance Segmentation.
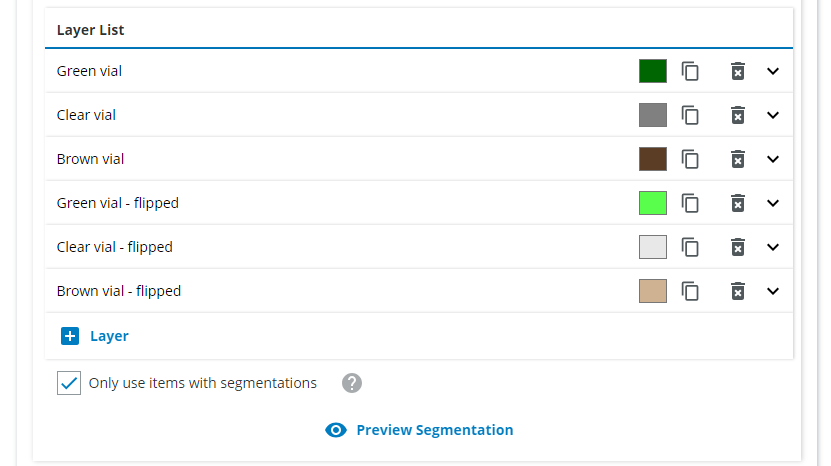
In the Layer List section we want to create one Layer for each class you want to detect. Name the first Layer "Green vial". Click on "Add Segmentation Class which belongs to current instance" and choose "Green vial". Click on "Add Segmentation Class" and choose "Green vial". If needed, change the class color to a green color.
For the second class, do the same but for "Clear vial", and so on until you have six layers (three for the normal vials, three for the flipped vials).
2. Combining multiple classes into a single class
This is the approach to choose if you want to combine multiple classes into one (for example, it is enough to identify only two classes "vial" and "flipped vial" rather than three vial classes and three flipped vial classes).
Add a new Feature and choose Instance Segmentation.
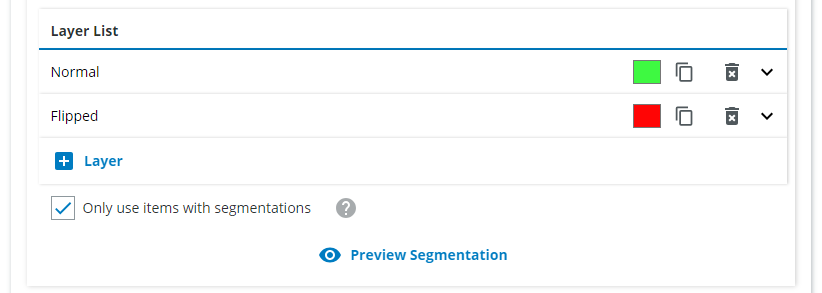
Since we want all of the normal standing vials to be found as one class, we name it "Normal vial". Click on "Add Segmentation Class which belongs to current instance" and choose "Green vial", "Clear vial" and "Brown vial". Click on "Add Segmentation Class" and choose the same classes.
Repeat for the "Flipped" class and define the class colors.
Define downsampling settings
Under Feature Settings, click on Downsampling and choose Both sides. Interpolation should be set to Area. The Target Height and Target Width should be set to 640x640. For Fitting, choose Fit image inside target area.
Why should I always choose 640x640 no matter which image input size the network has?
The downsampling/upsampling is internally done by dStudio. The highest input resolution available is 640x640, so if you later choose a smaller resolution network (eg. 416x416) the images will be downsampled automatically by dStudio. Choosing 640x640 therefore ensures that the images are never upsampled by mistake (which avoids loss of information).Splits - how much data should be used for training and evaluation?
Change the Export Settings to have "train" as 80% and "val" as 20%, and remove the "test" split.
Save and run Export
Click Save on the top right.
Click on "Create Snapshot" on the top right.
You can follow the progress of Snapshot.

Once the Export is done, click on Open in dStudio and continue in the dStudio training section of the tutorial.