Domain creation (dTag)
On the main page you will find the Create button. Click it, give the Domain a name and you will be redirected to the Domain edit page where you can create your Domain.

What is a Domain?
A Domain holds all the data that belongs to one application. For our application "Vials" all images belong to this domain. For another application that might have to do with images of bottles a new domain would be created to hold all the "bottles" data. A Domain has a definition which consists of multiple variable groups which hold variables. The values of these variables per data item are called annotation. If you have applications with overlapping data, they should be in the same domain, because you cannot share or combine data from different domains, they are strictly separated. Data can still be separated by setting annotations. Note, that you can always edit the domain even after you have imported images. For this please click on "Definition" in the left panel. You can add new variables, change the names of already existing ones or delete variables (but all corresponding annotations will also be deleted).More details on Domain creation
More information on how to create a Domain can be found in the Advanced Data Handling section. Some metadata is automatically created when uploading images - please see the Automatically generated annotations section.Adding Segmentation classes
In dTag, the Object Detection and Instance Segmentation classes are called Segmentation classes. Adding a new Segmentation class to a newly created Domain works similarly to how you would add a new class to an already existing Domain. We will use the Domain "Glass vials" we created in the dStudio workflow section for the object finding bounding box workflow as an example.
ℹ️ If you are using the "Dumplings and soy sauce" dataset, the setup is in principle the same.
In the Domains section of dTag, click on "Glass vials". This will take you to an overview page of the Domain. Click on Definition on the left and scroll down to the Segmentation Classes section. There you will find your six already existing classes.

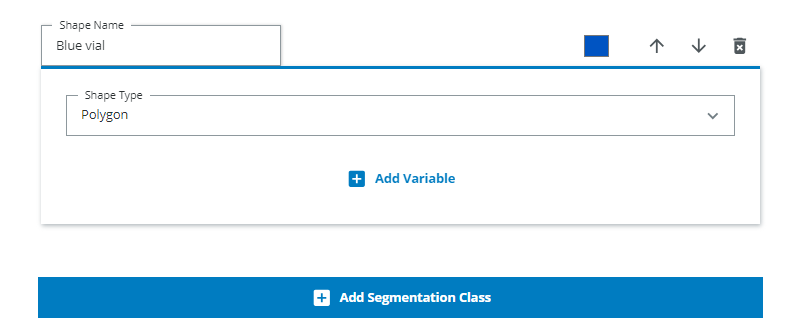
Let's say we want to add a new Segmentation class - "Blue vial". Scroll down to the bottom and press "Add Segmentation Class". Give it a name and let its Shape Type be Polygon. The Shape Type should be Polygon for both object detection and instance segmentation even though the output of the Object Detection networks are bounding boxes.This is because the assisted annotation tool will create polygon annotations which in the case of object detection are later converted into bounding boxes (i.e. rectangles) in the Export definition.
Finally, adjust the Segmentation class color to a blue color.
Adding additional information to segmentation classes
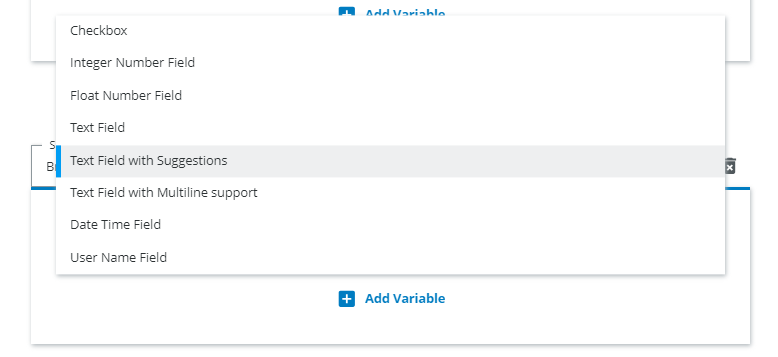
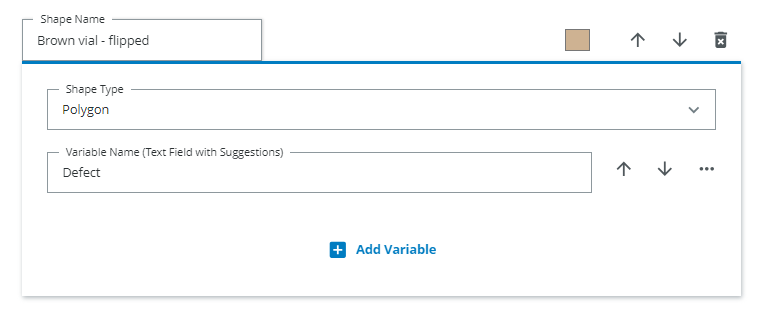
You can add additional information through the Add variable option. Imagine that some of the bottles are dented or have scratches on them and that we would like to keep track of that for each object instance. For that we would press Add variable and choose Text Field with Suggestions. For other object traits we might instead want to use checkboxes, integers (numbers), or some other type of information. Choose the one that best suits your application.
Don't forget to add a Variable to each of the classes if it is applicable to all classes (e.g. all classes can have defects).
Segmentation groups
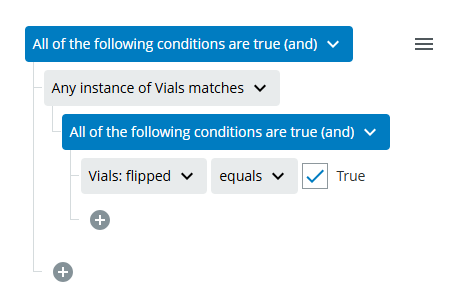
You could also structure your domain in a different way if your segmentationclasses have a lot of the same annotation variables. For example you can add a group "Vials" which have the segmentation classes "Brown vial", "Clear vial" and "Green vial" and the common property "flipped".
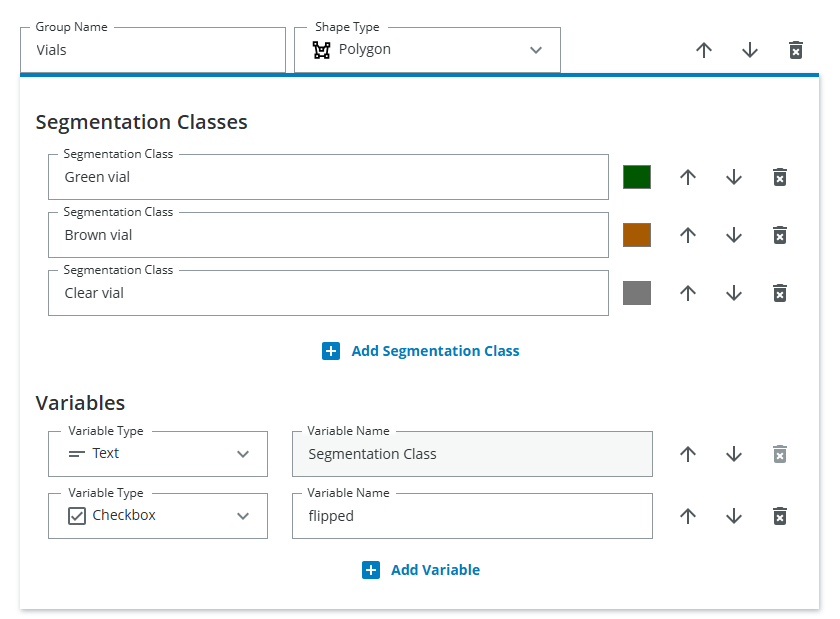
This makes it easier to find all flipped vials no matter the color, since you can later filter only for "flipped vial" instead of "brown flipped vial" OR "green flipped vial" OR "clear flipped vial"