Data augmentations deep dive
When setting up a dStudio classification training (as detailed in Training in dStudio), it is possible to use Data augmentations. This page covers what data augmentation is, why it can be beneficial to use and how and if you should apply it for your application.
Introduction
Data augmentation is a technique to synthetically generate additional training images by slight modifications of the existing ones. An example of such an augmentation is to artificially and randomly modify the brightness of training images during the training phase. The Neural Network will then become more robust with regard to variable light conditions as such a variation has been introduced in the training data. In general, various types of data augmentations add diversity to the training data set which makes the Neural Network less likely to overfit to irrelevant characteristics in the original set training images. Data augmentation is known to improve Neural Network robustness in general and it becomes especially useful when the original set of training images is small.
Be aware that data augmentation can only help to compensate some sorts of variations in your training data set. Variations like different forms and shapes of naturally grown products or unpredictable flaws might not be covered by data augmentation. In many cases, the best way to improve a training result is to collect more real training samples.
dStudio supports the following types of augmentations to the training images
- Translations
- Shearing
- Rotation
- Mirroring
- Size scaling
- Modification of the intensity (gamma, brightness)
- Adding random noise
- Random rectangular cutouts
Care must be taken when configuring and applying the data augmentations as the Neural Network decision quality may also deteriorate if these augmentations are applied incorrectly. Especially, the following two pitfalls must be considered:
- The augmentation must not be so strong that it removes the relevant information from the image. As example, one should not add so much noise to the image that the relevant pattern becomes obscured, or one should not apply a translation augmentation that risks shifting the object of interest outside the image border.
- The augmentation must not risk changing the class of the image. For example, if the Neural Network is to decide if an object is up-side-down or not, one must take care that a rotation augmentation is not configured so strongly that it may modify a training image in the Down class to appear as an image in the Up class.
Example: Classification of coins
In this example, a neural network is trained for the classification of three different types of coins (10 cents, 50 cents, 1€). 40 images per class have been collected for the training. A coin can be rotated and thus be oriented in different ways.

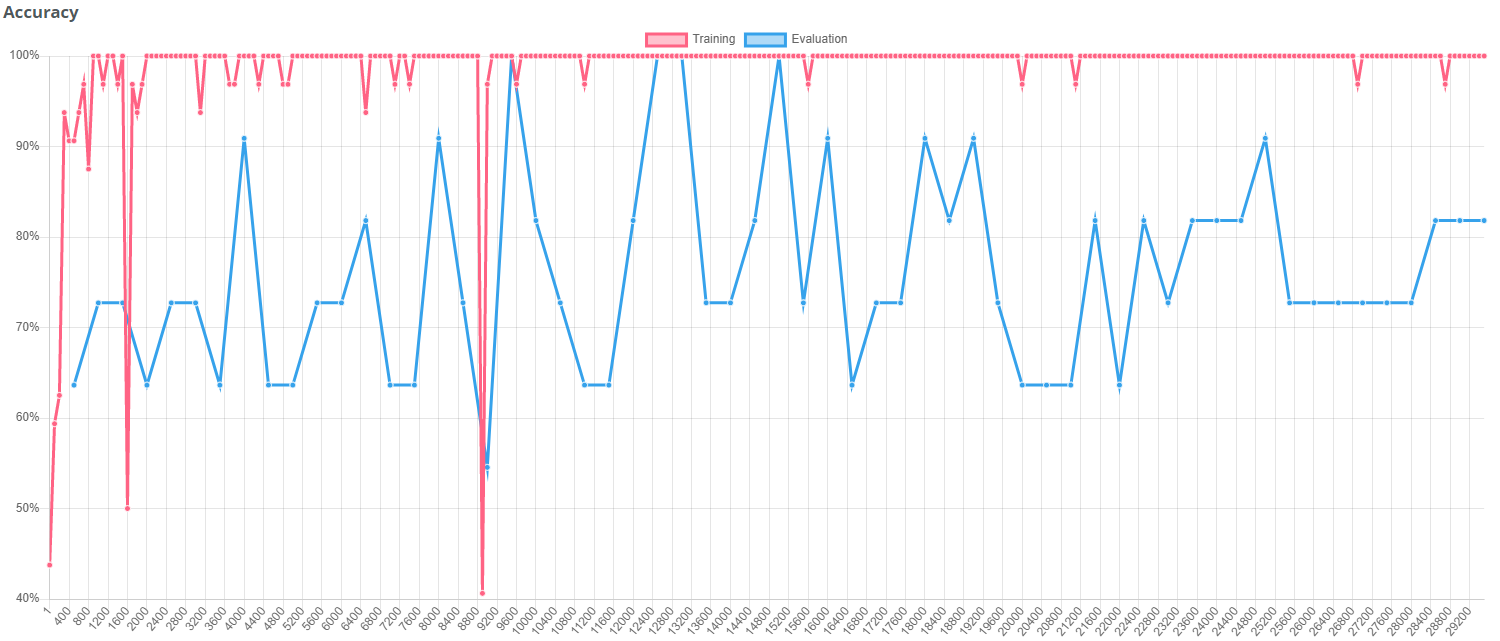
Default augmentations
This graph shows, that the set of 40 images per class is not sufficient to achieve a convincing training result. The default augmentations are not enough to compensate for the lack of training data.
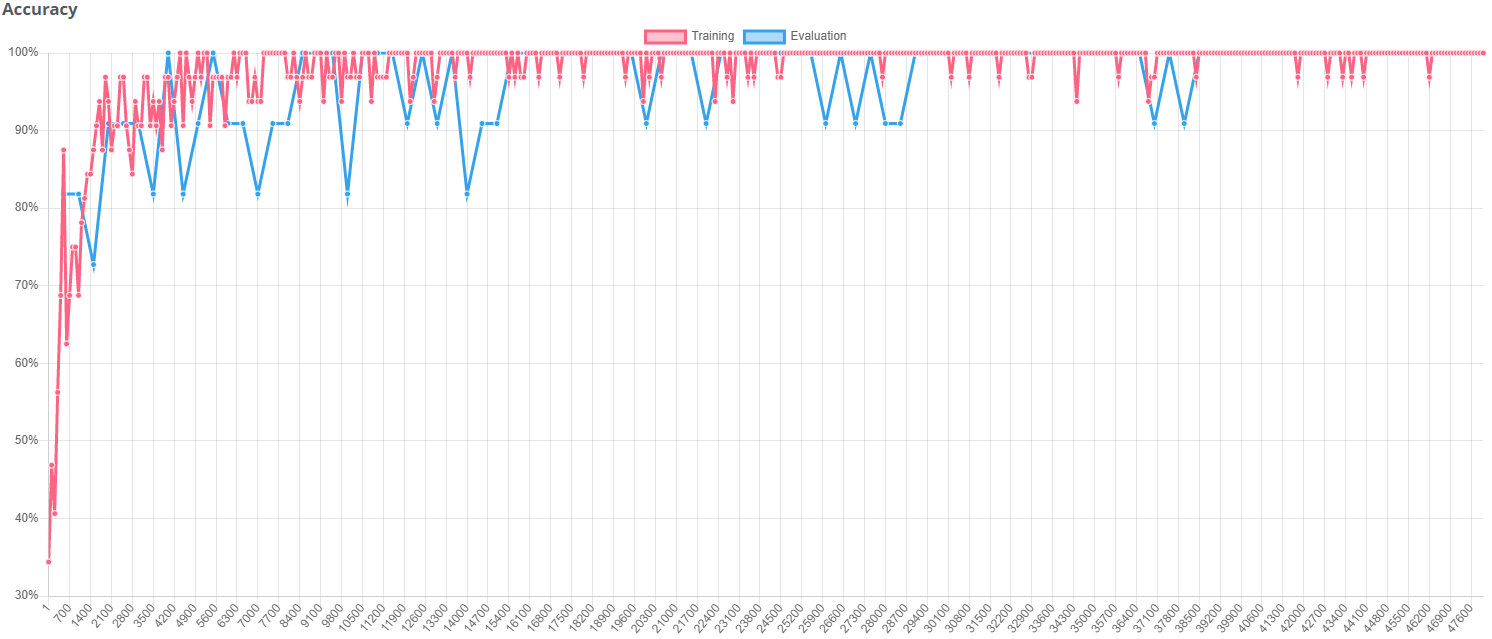
Improved training results with augmentations
When applying appropriate data augmentations, the result was significantly improved. In this case rotation and brightness have been augmented in order to improve the result.
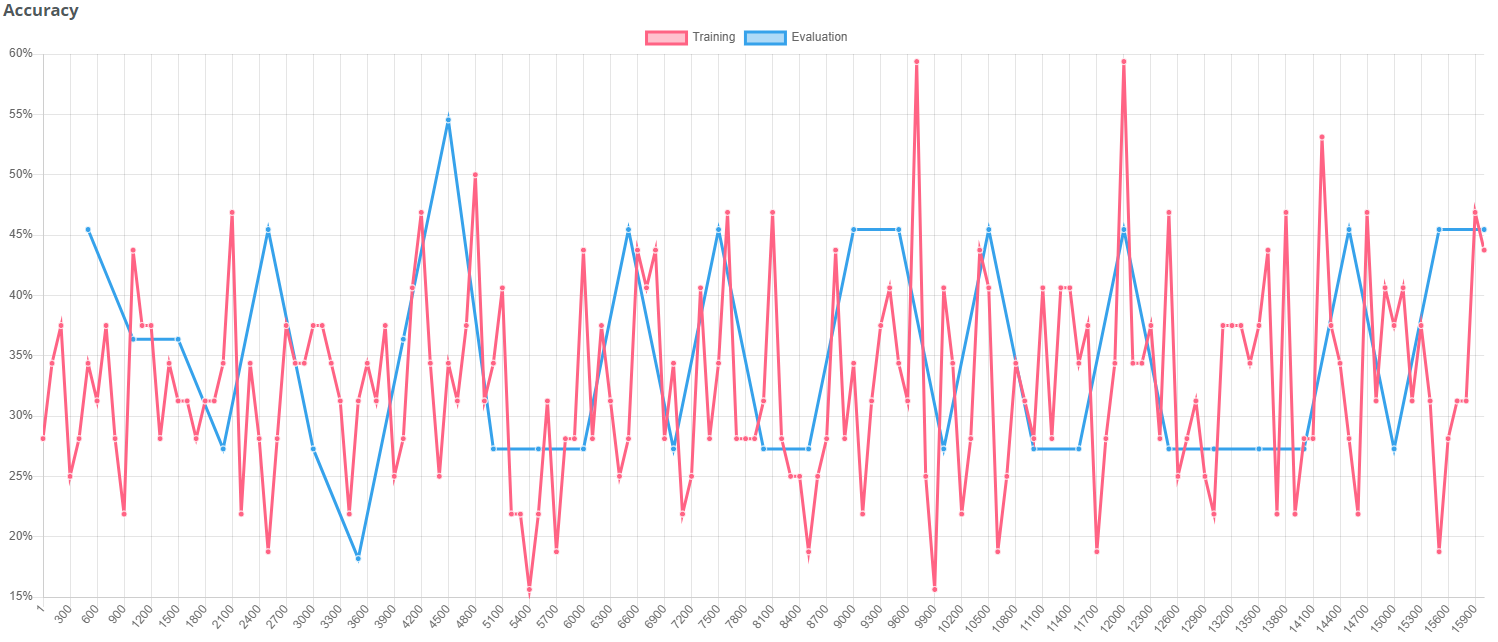
"Bad augmentations"
Warning! If you don't choose the applied data augmentations in a meaningful way, the training result can also get worse. In this case translations, noise and cutouts have been augmented in a strong way. The strong translation can move the coins "out of sight". Noise and cutouts do not really represent a variation that is expected in these images and therefore also deteriorate the training result.
dStudio workflow
When creating a project in dStudio, users see an additional step called "Augmentations" in the project creation workflow.
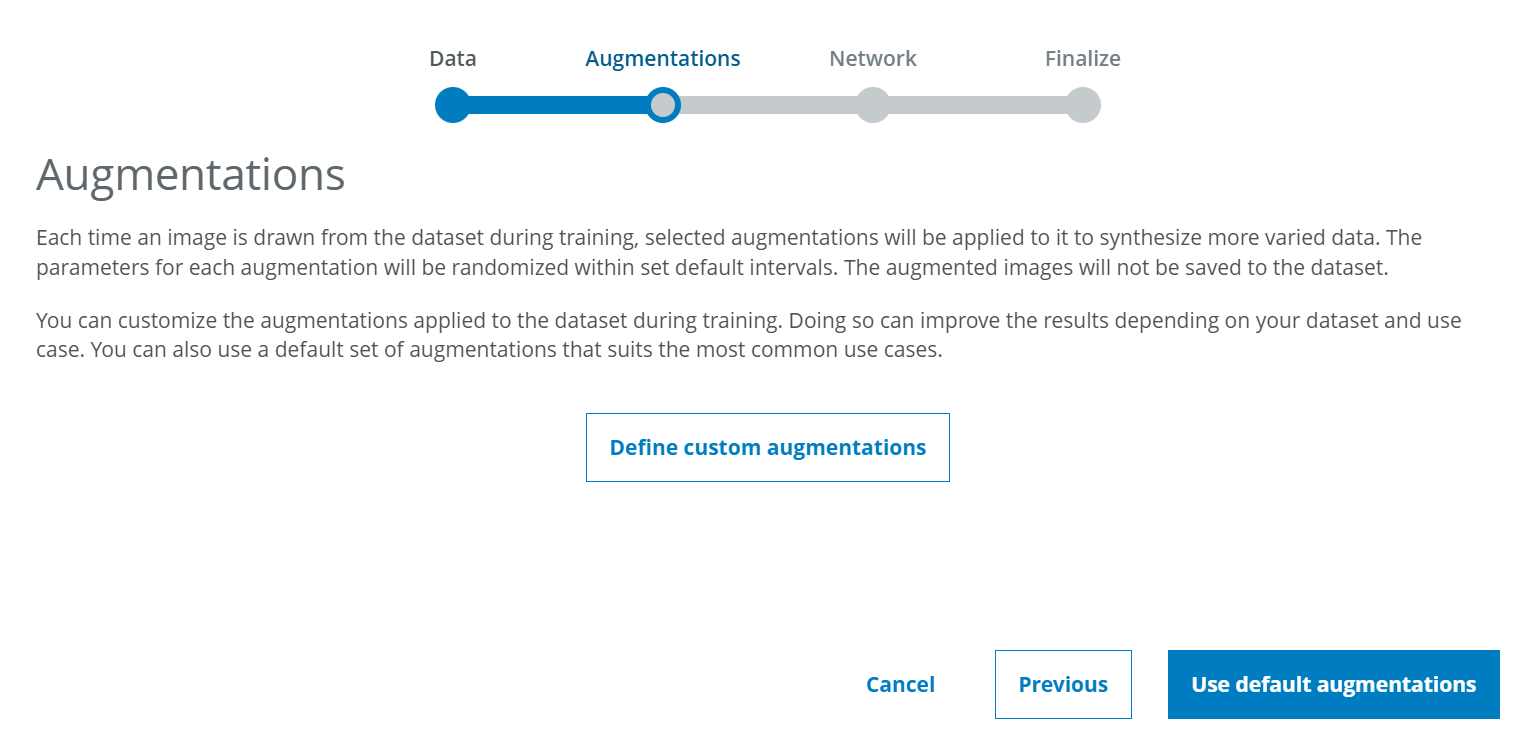
At this point, the user can choose between using default augmentations and defining customized augmentations.
Default augmentations
Default augmentations is the option you should choose if you plan to train a neural network in the same way as you have done so far. Even before enabling our users to customize augmentations, dStudio made use of some subtle augmentations in order to improve the robustness of the training results. These settings have been selected and defined by our experts to obtain the best possible results in most industrial applications. We recommend to continue using these default augmentations unless you have a clear idea of variations that you will face in your application.Define custom augmentations
If you decide to define your individual augmentations, you will be given the possibility to activate or deactivate the different types of augmentation and modify the range in which the augmentations are being applied. To see more detailed information as well as more preview images, you can click on the small info icon in the lower right corner.
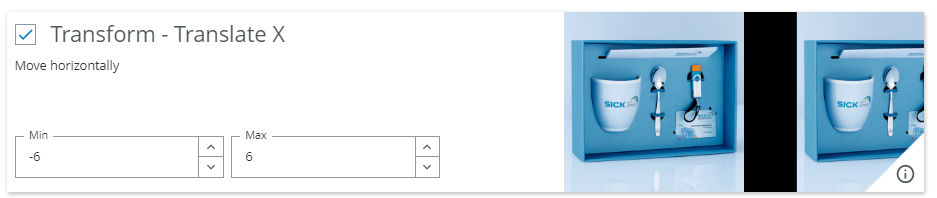
For each type of augmentation you can select via a check box if you want this type of augmentation to be applied or not. Furthermore, you can determine the degree of variation that you want to allow for each type of augmentation.
Example: If you expect the distance between camera and object to vary, you can activate the uniform scaling augmentation and define within which range you want the size to vary.
How are augmentations applied?
Activating data augmentation will not increase the number of training images that you have added to your dataset in dStudio. The augmentations will rather be applied while the training is running. In each training iteration step, each image used in that iteration step can be arbitrarily modified within the augmentation range specified by the user and be used in this modified version during this iteration step.
Complete list of augmentations available in dStudio
Transform - Translate X - Move horizontally
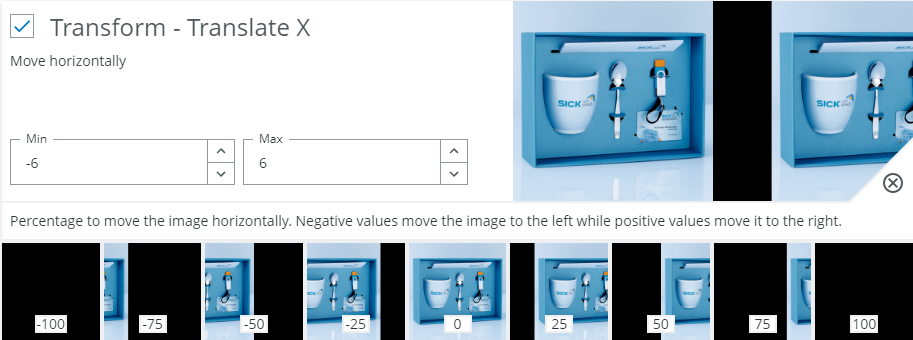
When to use?
When the object can occur in different locations. Most often a small value should always be used.
Possible pitfalls:
- Decreases accuracy when a class depends on the position of a feature. Example: If a red button in the middle of the image means error, but if it's at the left side it's fine.
- Avoid translating too far as relevant content may fall outside the image frame.
Transform - Translate Y - Move vertically
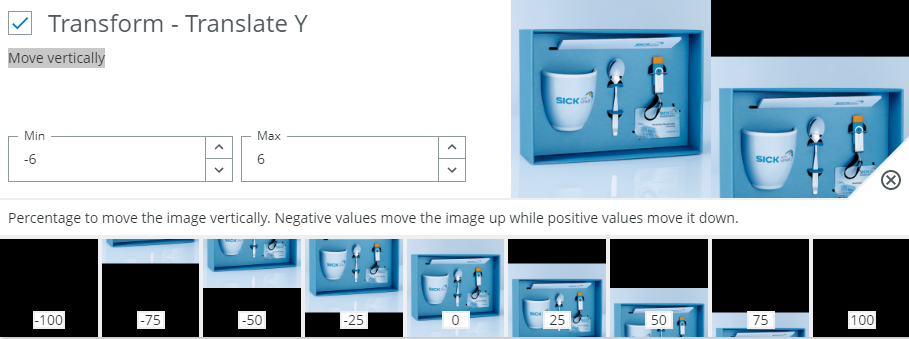
When to use?
See above for Transform - Translate X.
Transform - Shear X - Skew horizontally
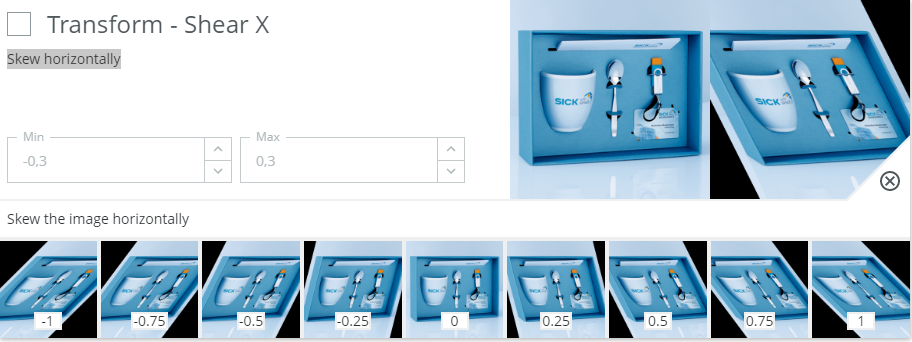
When to use?
Typically used for simulating distortions. Could be either from perspective changes (camera positioning) or from slanted hand writing, etc. Use this option moderately to preserve general geometries.
Possible pitfalls:
- Avoid if the content on the image depends on the geometrical properties. Example: If trying to classify if a box is damaged or not, it may be important to preserve the rectangular shape of a correct box.
Transform - Shear Y - Skew vertically
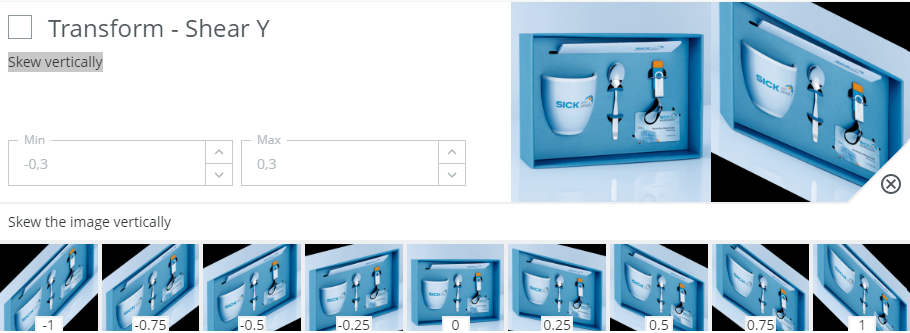
When to use?
See above for Transform - Shear X.
Transform - Rotate - Rotate the image

When to use?
A small rotation is usually good to have. This accounts for slight variations in placement of the object.
Possible pitfalls:
- Avoid too large rotations if the class labels depend on orientation. Examples: Numbers (6 and 9 can be confused) or symbols.
Transform - Scale - Scale image uniformly

When to use?
Typically useful if the class does not depends strictly on size.
Classifying a coin could benefit from scaling as it can prevent classification breaking down if the camera is moved closer or further away from the subject. I.e. there are other features of the coins that should be used apart from their size. Augmenting the size will allow the neural network to realize this and not put too much emphasis on the size.
Possible pitfalls:
- Should be avoided or restricted if the classification task is to determine the size or in other ways depend on size. Example: If we want to sort small and large potatoes, we should not augment their size too much during training.
Transform - Scale X - Scale horizontally
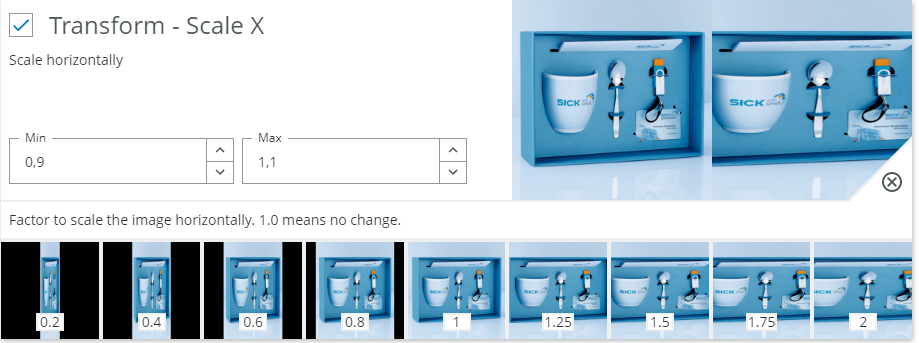
When to use?
Similar to scale but non-uniform. This allows scaling independently in X. In general objects don't deform non-uniformly and scale typically changes equally in X and Y when zooming or moving the camera.
For this reason it's usually more reasonable to use the combined Scale instead of the separate Scale X/Y.
Use this option if you know that the classes could scale in either direction, but still retain their class. Apart from that, see examples from Scale.
Transform - Scale Y - Scale vertically
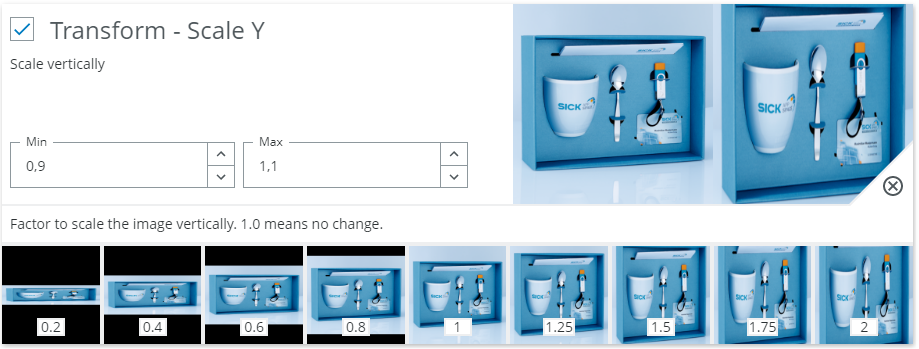
When to use?
See above for Transform - Scale X.
Transform - Flip X - Mirror horizontally
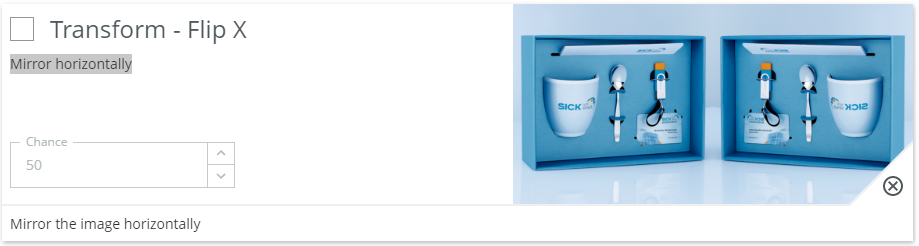
When to use?
Mirroring the image in the vertical axis is effective for making the network agnostic to things such as direction of illumination and to some extent the shape of the object. Most natural objects remain in the same class if they are mirrored. Chicken breast files, apples, screws etc.
Possible pitfalls:
- But for some cases the mirroring is important. Examples: Wires in a cable should be in a particular order, the letter p is not the same as q. Note that for the cable case a rotation could be fine as the order of the wires would not change, but a mirroring would change this.
Transform - Flip Y - Mirror vertically
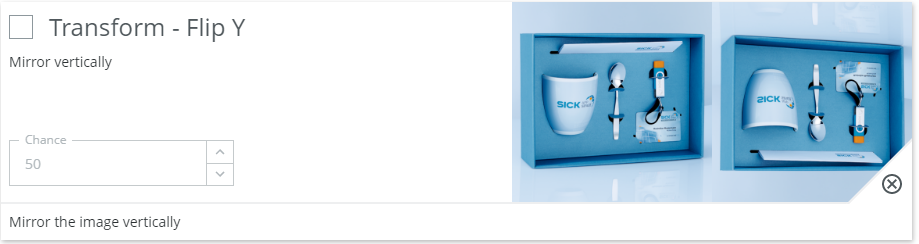
When to use?
See above for Transform - Flip X.
Gamma - Augments image gamma.
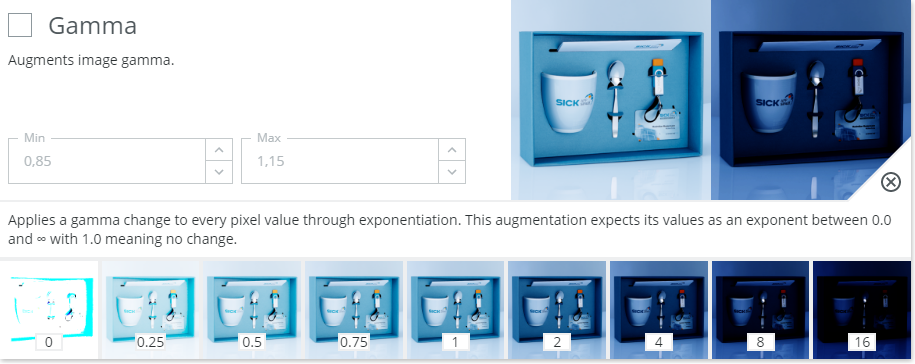
When to use?
Mainly used to increase robustness against illumination changes or camera setup.
Gamma scales the input image in the original linear color space as opposed to the typical sRGB color space used for monitors. This means that it's a pretty good augmentation to simulate real world light variations.
Possible pitfalls:
- In general gamma can be used for all input image types. It should only be avoided if the class decision depends on the brightness of the content. Example: Checking the quality of prints or engravings. Even so it's probably not a big problem unless parts of the image saturate towards black or white
Brightness - Augments image brightness.
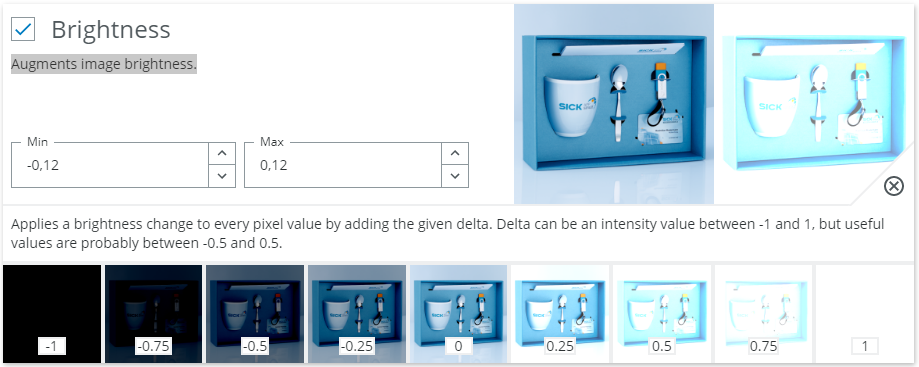
When to use?
Mainly used to increase robustness against illumination changes or camera setup.
Brightness in our implementation seems to scale the image additively. That is, subtracts from or adds to the raw pixel values. This is not a very physical model, but tends to work well both for light variations and limited subject variations.
Possible pitfalls:
- Can in general be used for all input image types. It should only be avoided if the class decision depends on the brightness of the content. Example: Checking the quality of prints or engravings. Otherwise the main problem to look out for is if the image saturate towards black or white.
Contrast - Augments image contrast.
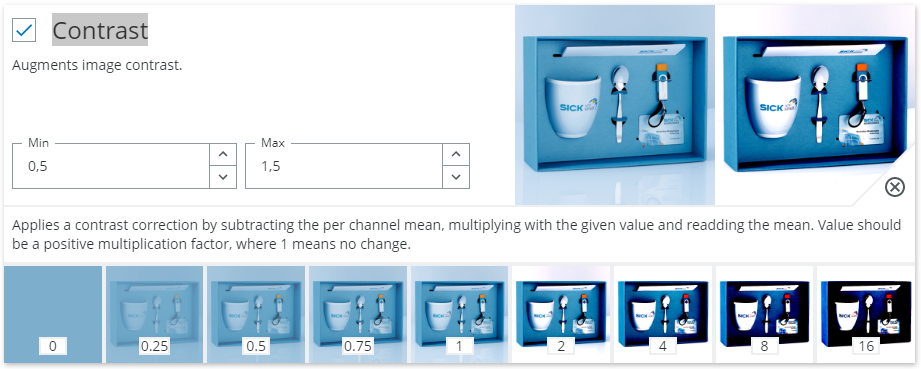
When to use?
Mainly used to increase robustness against illumination changes or camera setup. Adjusts the different between bright and dark parts for the image. Either exaggerating or dampening the difference. Like for the above cases if should typically be enabled. The intuition behind this is that the neural network should learn to observe image structure, but not be too concerned with the actual scale of structure changes.
Possible pitfalls:
- Avoid to extreme values as it will either binarize the image or completely wash out any information.
- If the thing that is important for classification is the difference between different colors or intensities this option may need to be disabled. Example: Print or color quality classification.
Noise - Applies random noise to image.
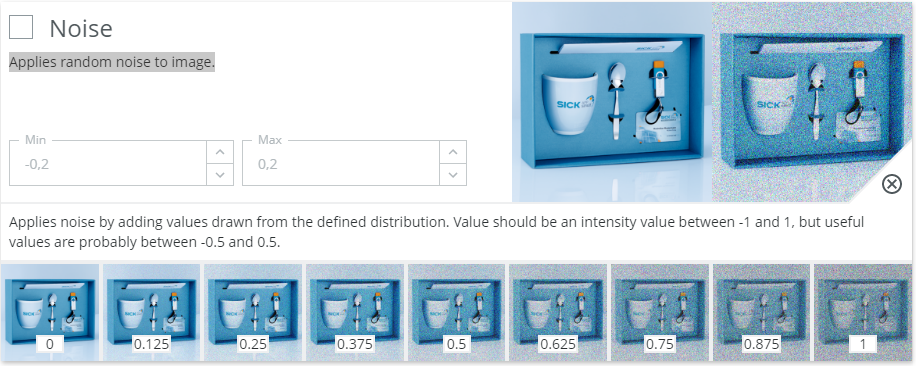
When to use?
Increase robustness to small, local random variations in the image.
This option can be used to generalize better and to learn larger concepts compared to local class indicators.
Typically if the input images can have a certain amount of graininess to them this option could help. Also it could help generalize between imagers as they typically have different levels of fix pattern noise and shot noise.
Cutout - Randomly sets squares in the image to zeroes
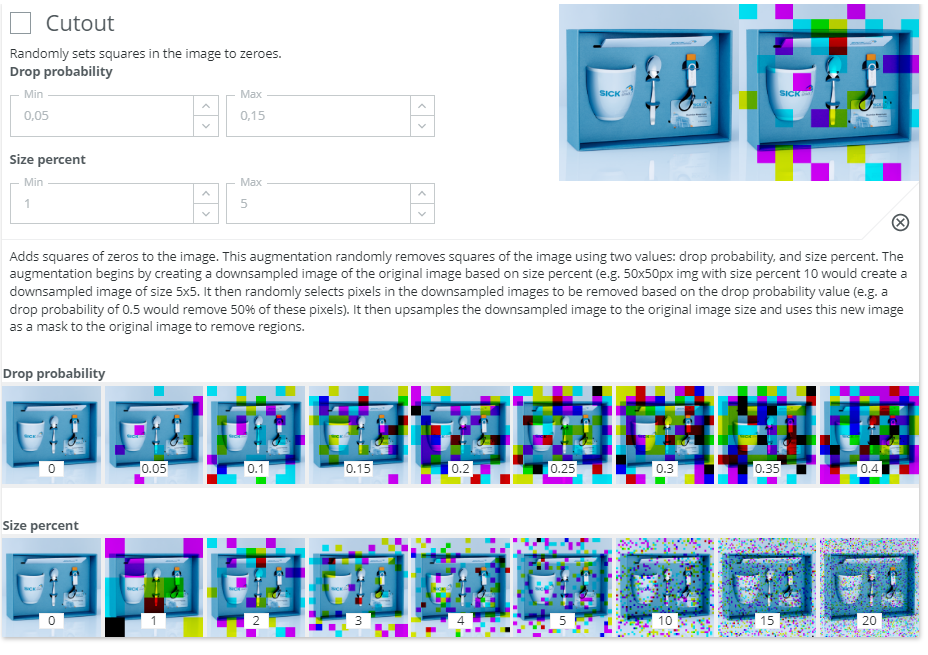
When to use?
Typically good if we want to force the network to consider a larger part of the input image when making a decision and thus avoid using small local features. Useful if the class can be decided based on several features in the image and not just a very local detail. It's best when the network can be forced to learn to understand partial observations. For example when an object is partly covered by another object.
Possible pitfalls:
- Less useful if the class depends on a very local detail. Example: Probably not good for learning to verify that a screw is inserted into a hole a the top left corner, but useful when learning to separate chocolate cookies from wheat cookies.
- The size and frequency of the cutout is also heavily related to the content of the images. In general it's not good if the important information can be completely covered by a cutout block.