Snapshots
Export Project Creation
To get data for training you can create snapshots of the data. In this example you will use all images with 200dpi which have the different types of nuts on them as separate classes. Please make sure you have annotated a few images correctly before proceeding.
Click the create button and choose TFRecord (the data format for training) and then Simple Mode. The differences for developer mode will be explained below.

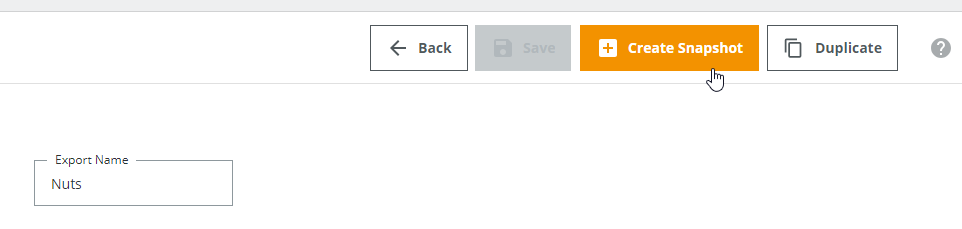
Name the export project "Nuts Classification"
Export Projects
Each Snapshot of an export project is an exact set of the data as it is at that time. When creating another snapshot of the project again at a later time the data might have changed (new data, modified annotations). For every project multiple snapshots can be created, but after the first snapshot the project definitions cannot be changed anymore. You can also duplicate a project (but not its snapshots) in case you want a similar project with only small changes.Prefilter
Prefilter the data for images from Waldkirch.
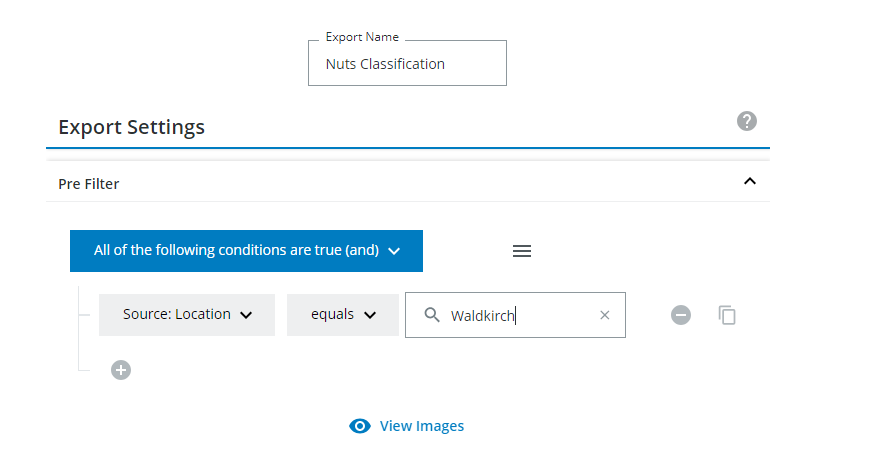
Only images that are selected via the prefilter will be used for any snapshot of this project.
Simple Exporter Mode
Classification Labels
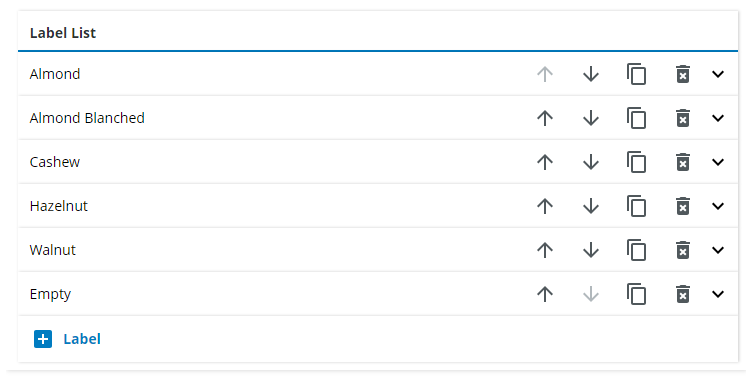
Open the classification labels dropdown and add a new label. Name it "Almond" and add a filter for the classification variable "Almond" and set it to true. Also add the other types and set them to False.

Do the same for the other types. Use the duplicate label button to be quicker.
Every label in the labels list can be learnt by a neural network. You can view which images belong to which label and the number of images that will belong to the label by clicking on "View images". This already takes into account any prefilter you used.
Downsampling and Image Color
Set the image color to be used for the snapshot to gray.
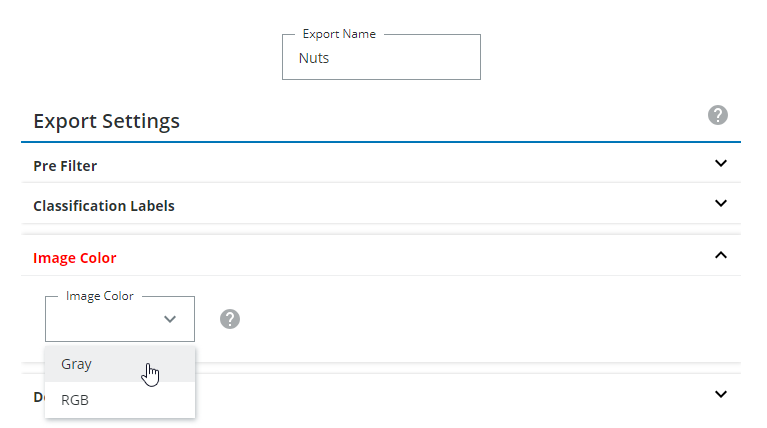 Gray means you only have black and white images, RGB means color images. If you have gray images (black and white) AND color images at the same time, you will need to use the developer mode, which is explained below and choose "Mixed".
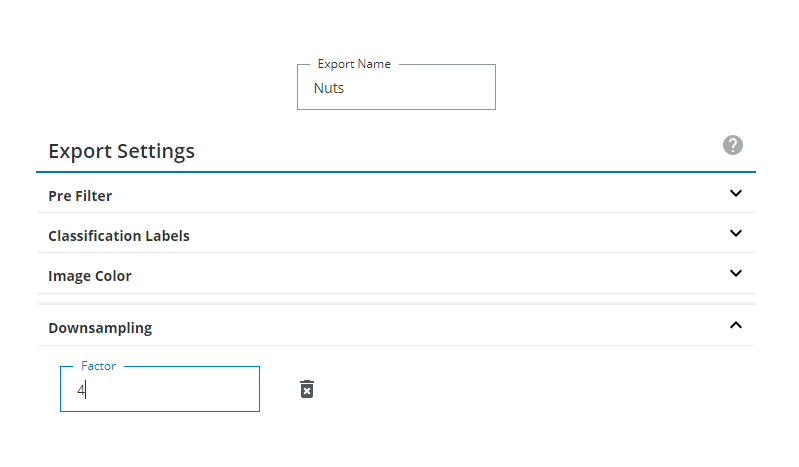
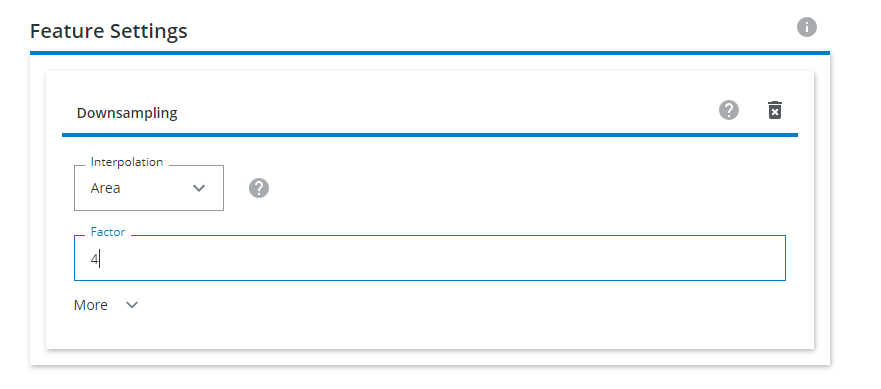
Also add a factor of 4 to downsample the images. The training is not done on the full resolution but on
smaller images.
Save the project.
Snapshot Creation
Click on Create Snapshot to generate a snapshot to be used for training, for example in dStudio.
 It may take some time to create the snapshot.


Combining annotations for labels
Duplicate the project you have just created by clicking on the duplicate button.
Now we want to create a project that has only 3 labels: "walnut","other nut" and "empty". Delete all labels except for the "walnut" and "empty" label and add another label with the following filter:
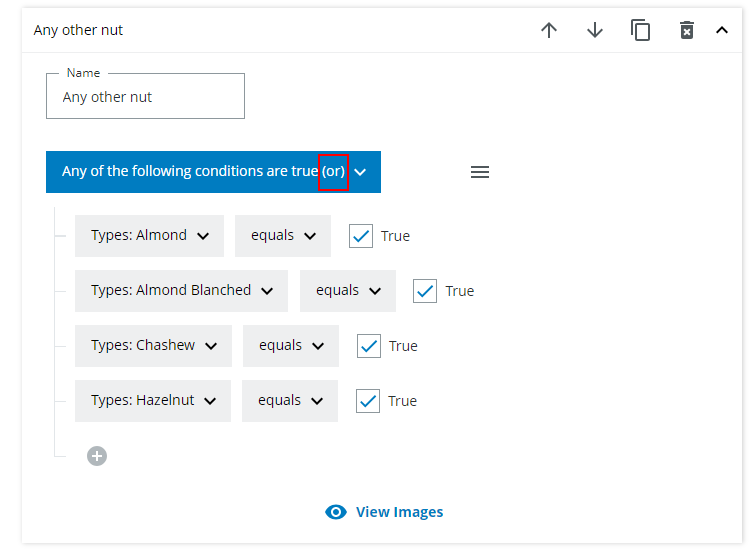
This will add any nut to this label as long as it is If you were to use a snapshot defined by this project for a training of a neural network it would only learn 3 classes as opposed to the 6 classes above.
Advanced
Developer project mode
In most cases you do not need to read this section.
Developer project creation
Create a project using developer mode, name it "Nuts Classification Developer". Do not add a prefilter.
In the features list you will see as a default there already is the image feature. This means the image is already added to the TFRecord
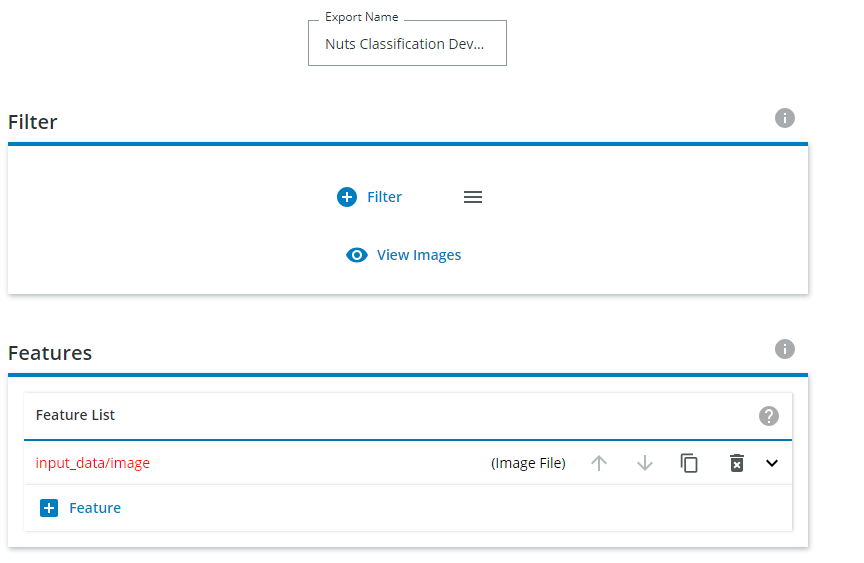
Features
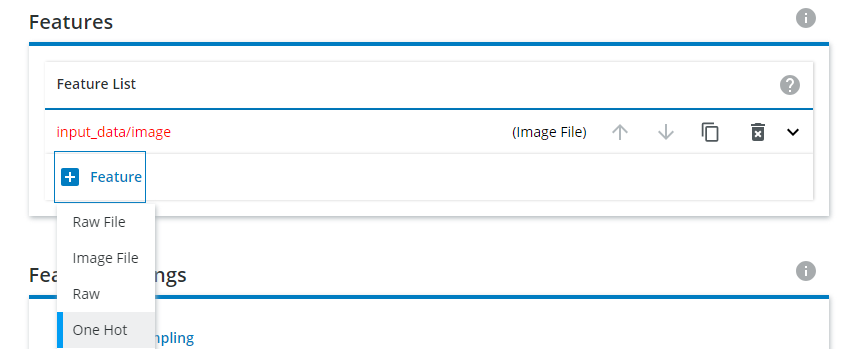
You can combine features as you like. The most common case is
- image file feature + onehot feature (Classification)
The name of the feature is already predefined to match what dStudio is working with, do not change this.
Classification Labels
Add a one hot feature to represent the classification labels.
Add labels in the same way as in the simple export mode. Add one for Almonds, Blanched Almonds, Hazelnuts, Cashews, Walnuts and Empty.
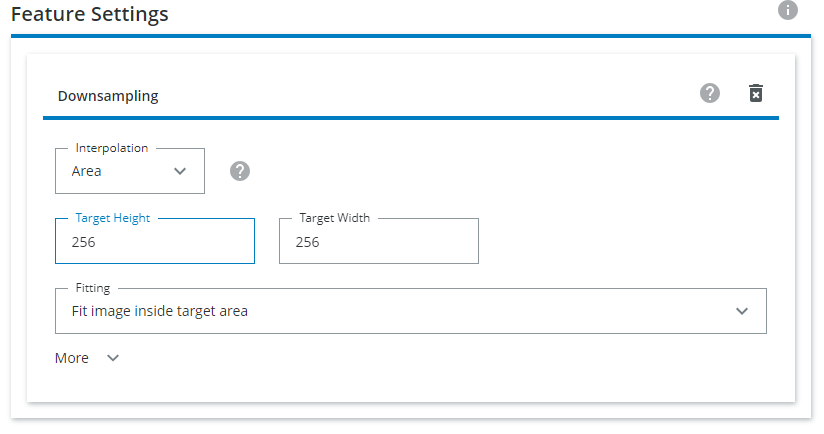
Downsampling
Downsample the image by choosing "Both Sides" and choose 256 as Target Height and Width.
Downsampling
You can downsample using different techniques and different interpolation methods. To find out more about the downsampling options, choose one downsampling technique and click on the question mark icons. Every image file feature can be downsampled individually or you can downsample all image file features in the same way by using the Feature Settings for downsampling. If the individual downsampling (1) within the image file feature is used the Feature Settings downsampling (2) is ignored.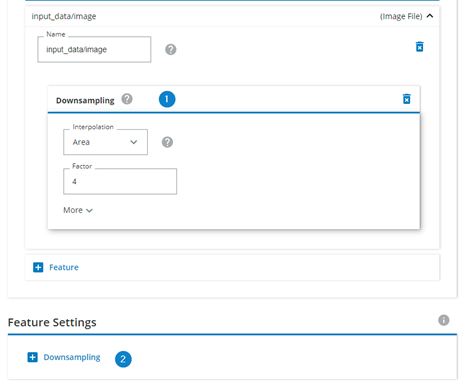
Splitting the Data
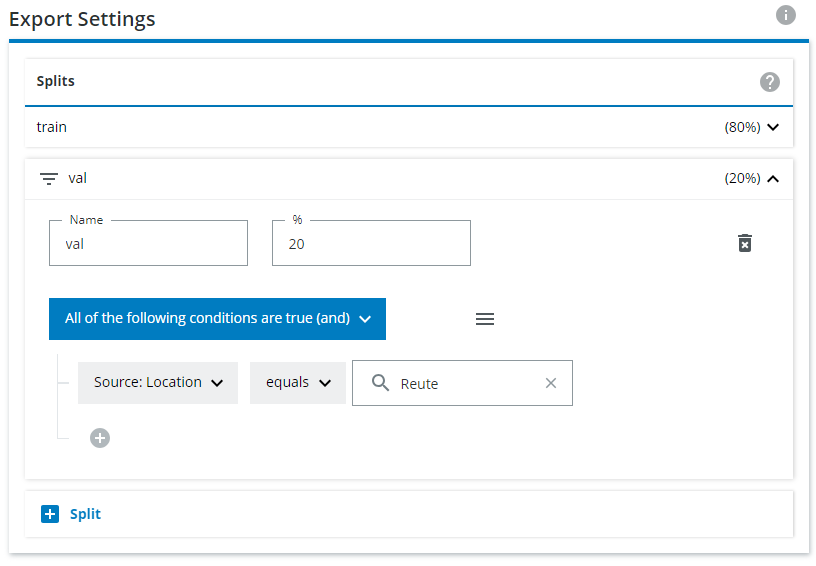
Change the training split to 80 percent and the validation split to 20 percent. Also put all nuts from Reute into the test split.
Save the project.
Splits
The data is split into 3 parts, the default is 70 percent for training, 20 percent for evaluation and 10 percent for testing.
Ratio
Split the whole dataset into different parts by specifying the percentage of items for each split. For every split a bin is created in which the items are sorted. Every item has a fixed random number, created when the item was uploaded (i.e. the ID) which corresponds to the percentage and determines in which bin the item is put. For example, for 100 items with random IDs between 1-100 the items with IDs in the range 1-70 go into the 70% bin and so on. This ensures that the splits are consistent across different snapshots of export projects, but it may not represent the exact split percentage.
Filter
Additionally, a filter may be specified for each split. Every item is first checked for a matching filter and for the first matching filter it is put in that split and ignored by the percentage split (this means the percentages in the resulting export may actually be biased).